Step 1:
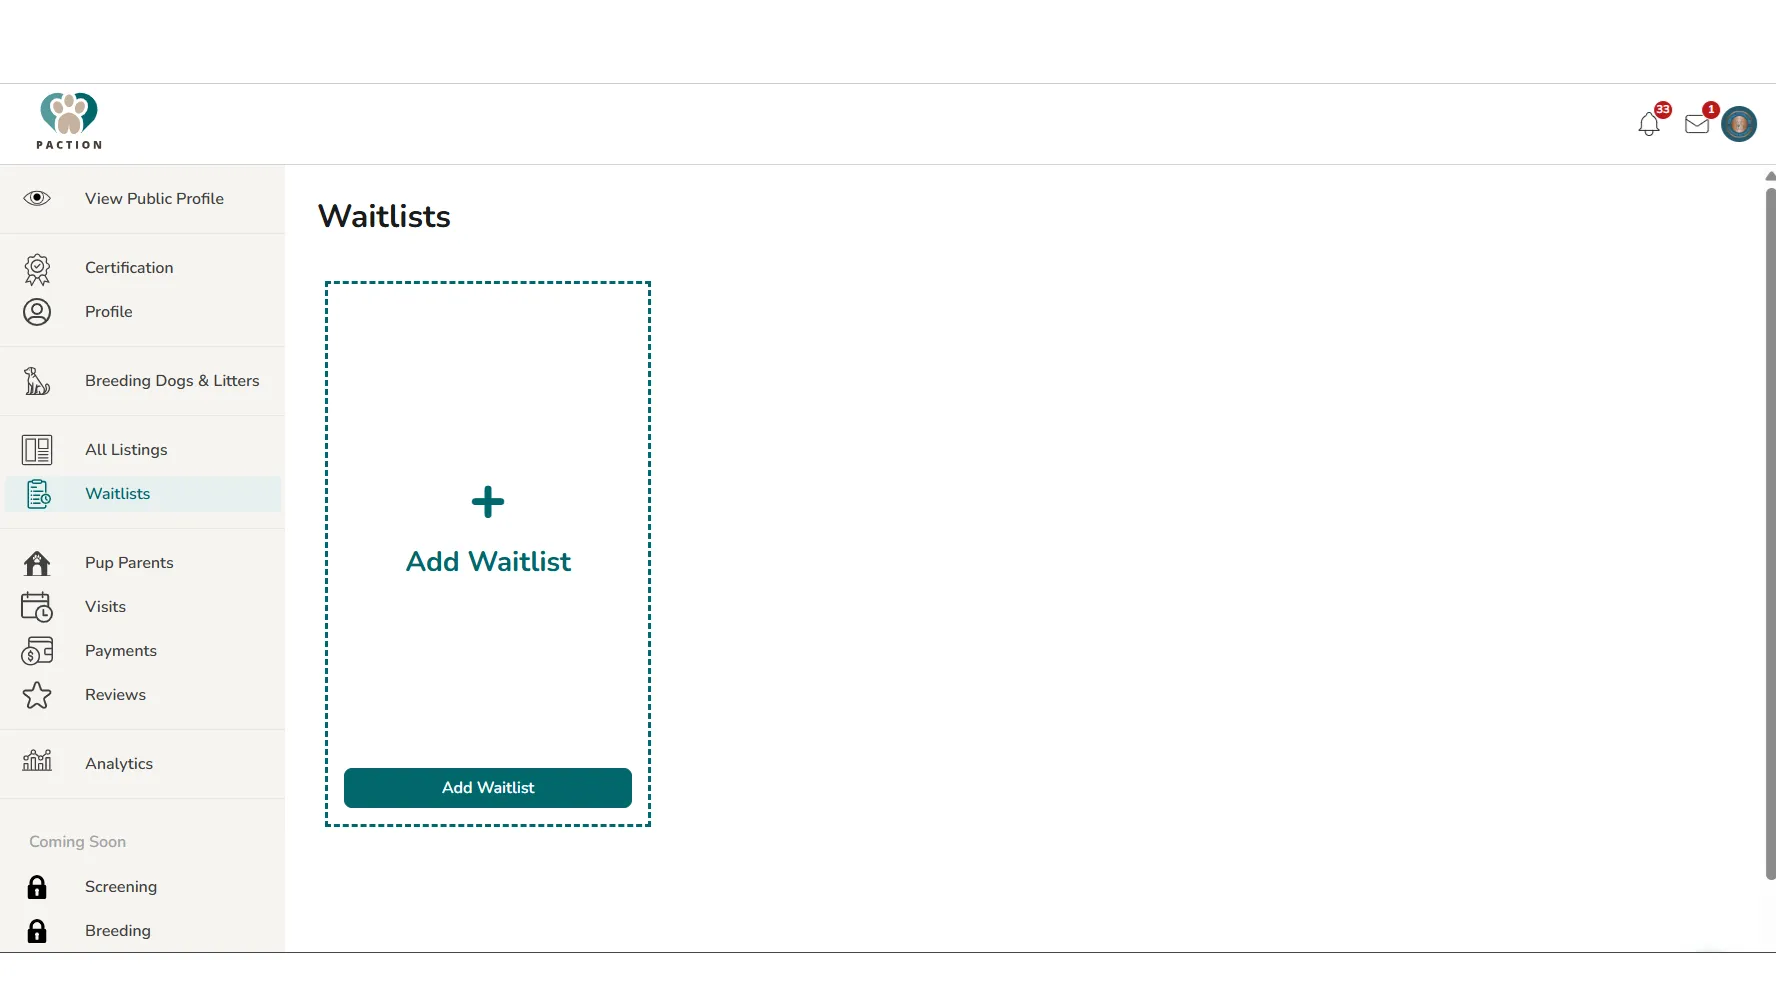
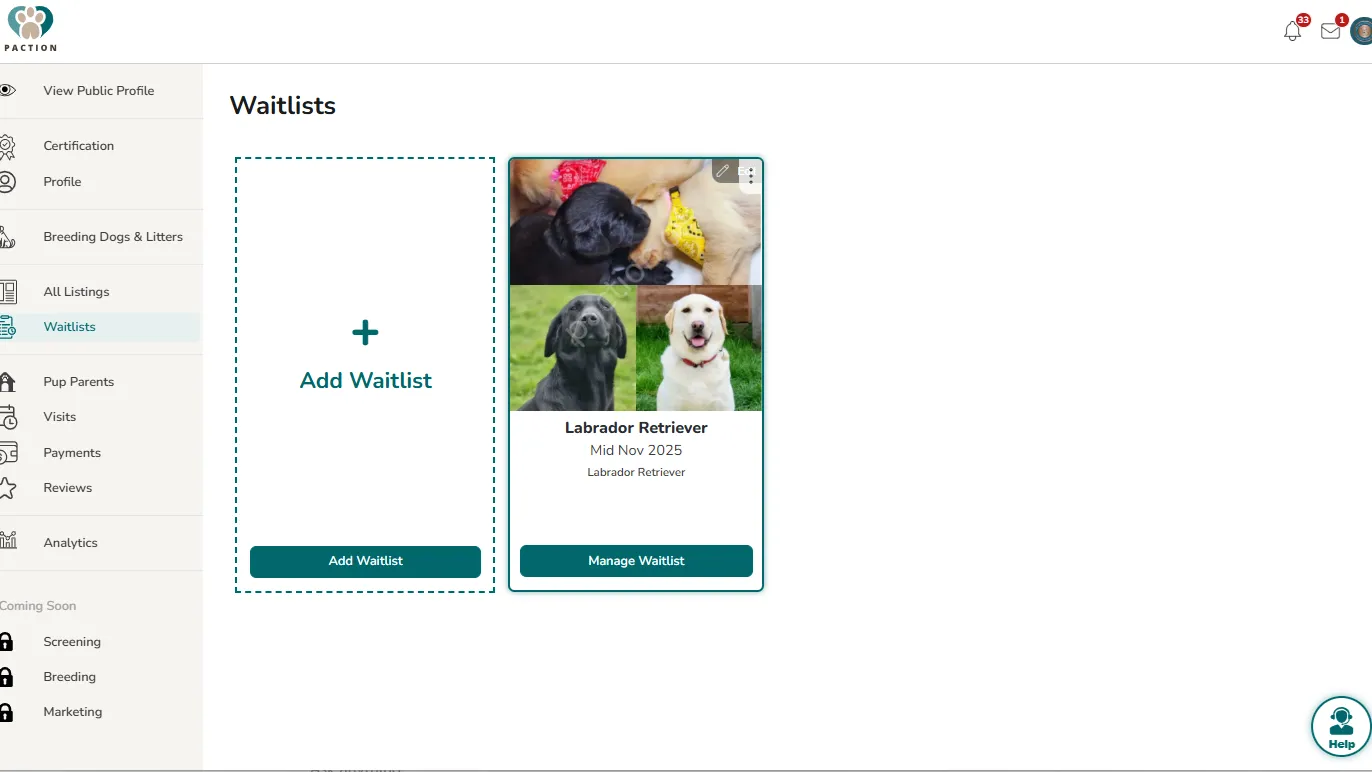
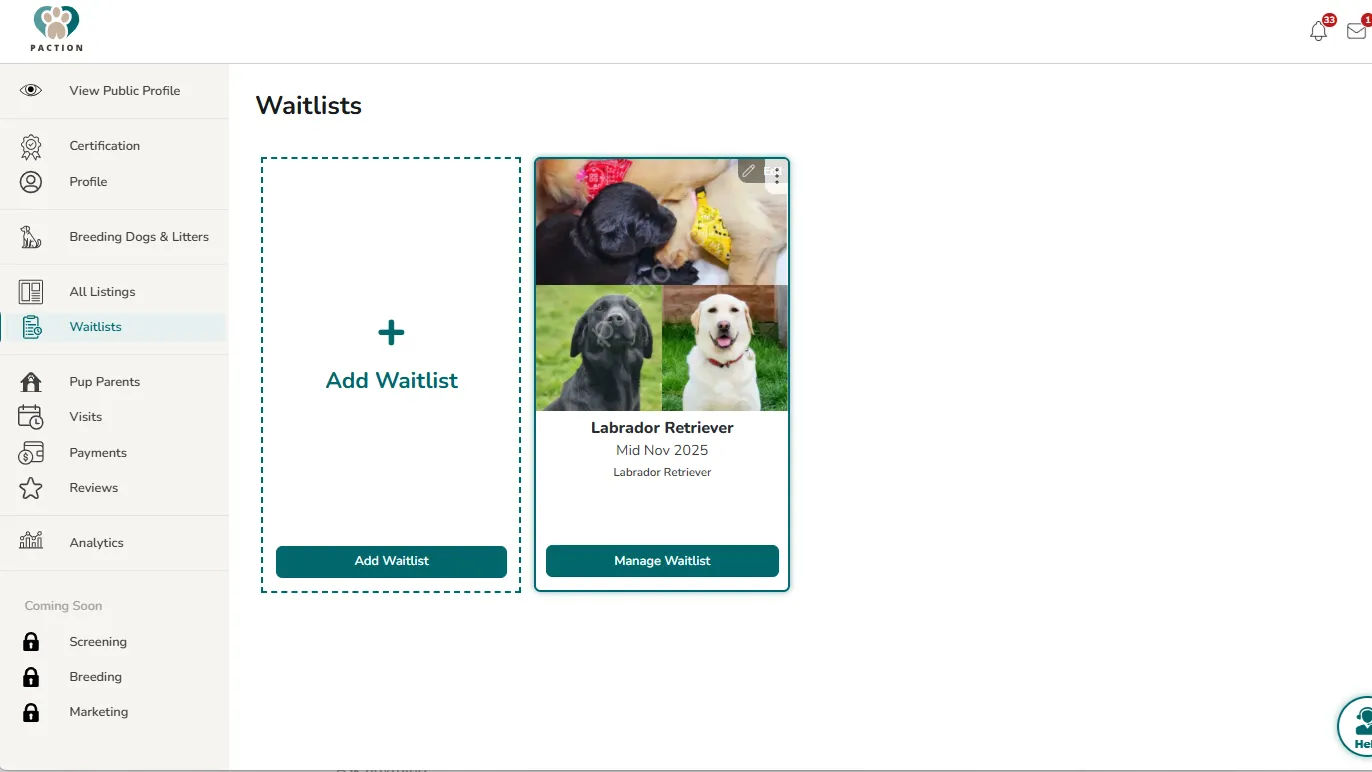
Once logged into your account, select "Waitlists" on the left navigation. Then, click the white card that says "+ Add Waitlist".

Step 2:
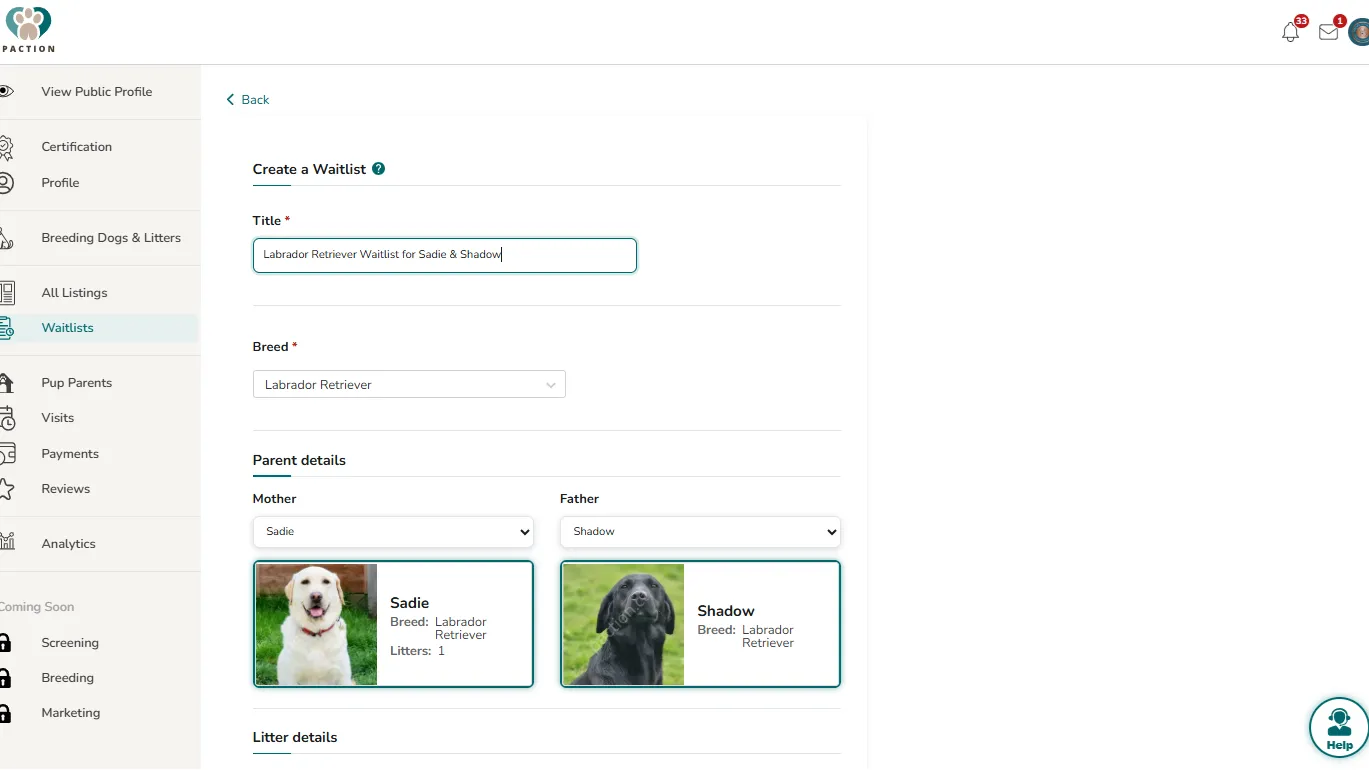
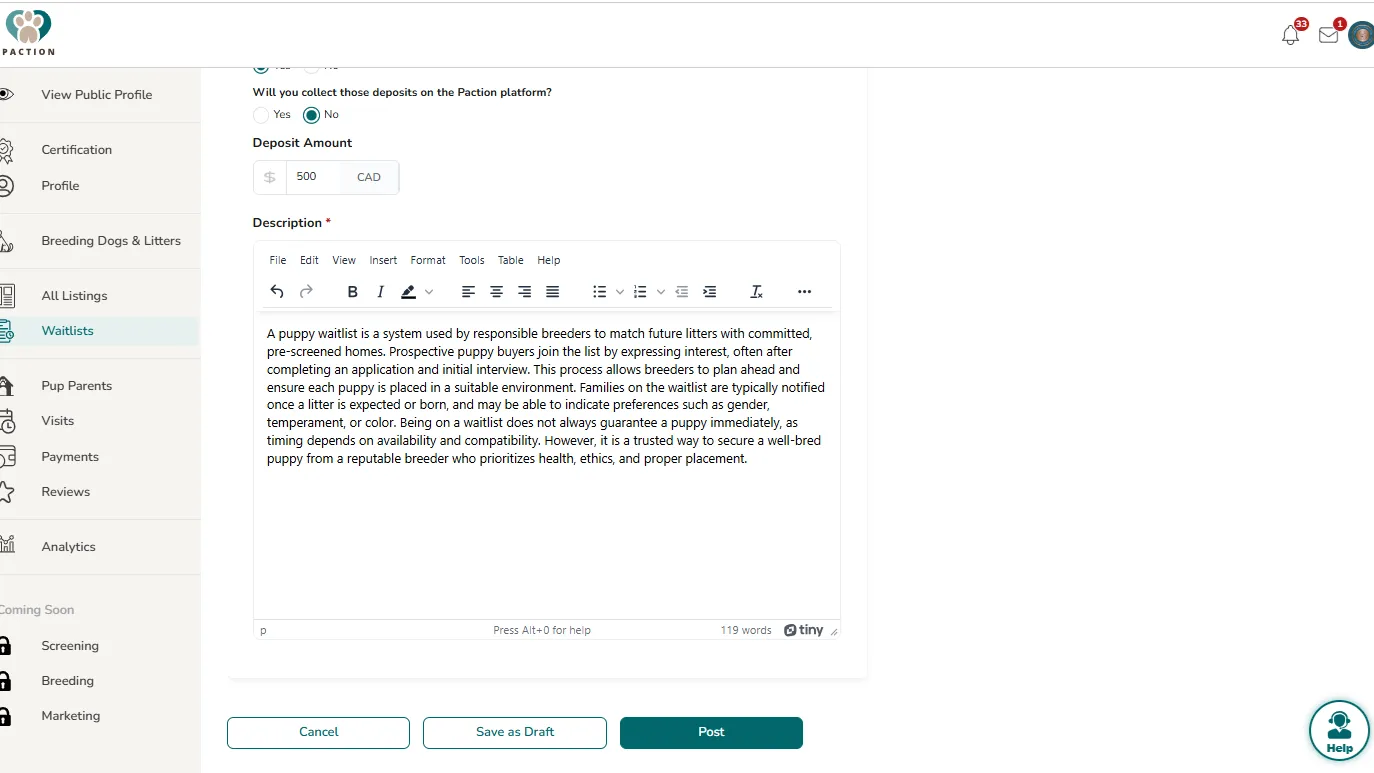
Add Waitlist details, photos and a description. Red asterisks indicate required fields.
Step 3:
Once complete, choose to Save Draft or Post the Waitlist.
Step 4:
Once posted, you will see the Waitlist on your dashboard. Click the image to view and the "Manage Waitlist" for workflow tools. Or, select "Edit" to change the Waitlist details.
Step 5:
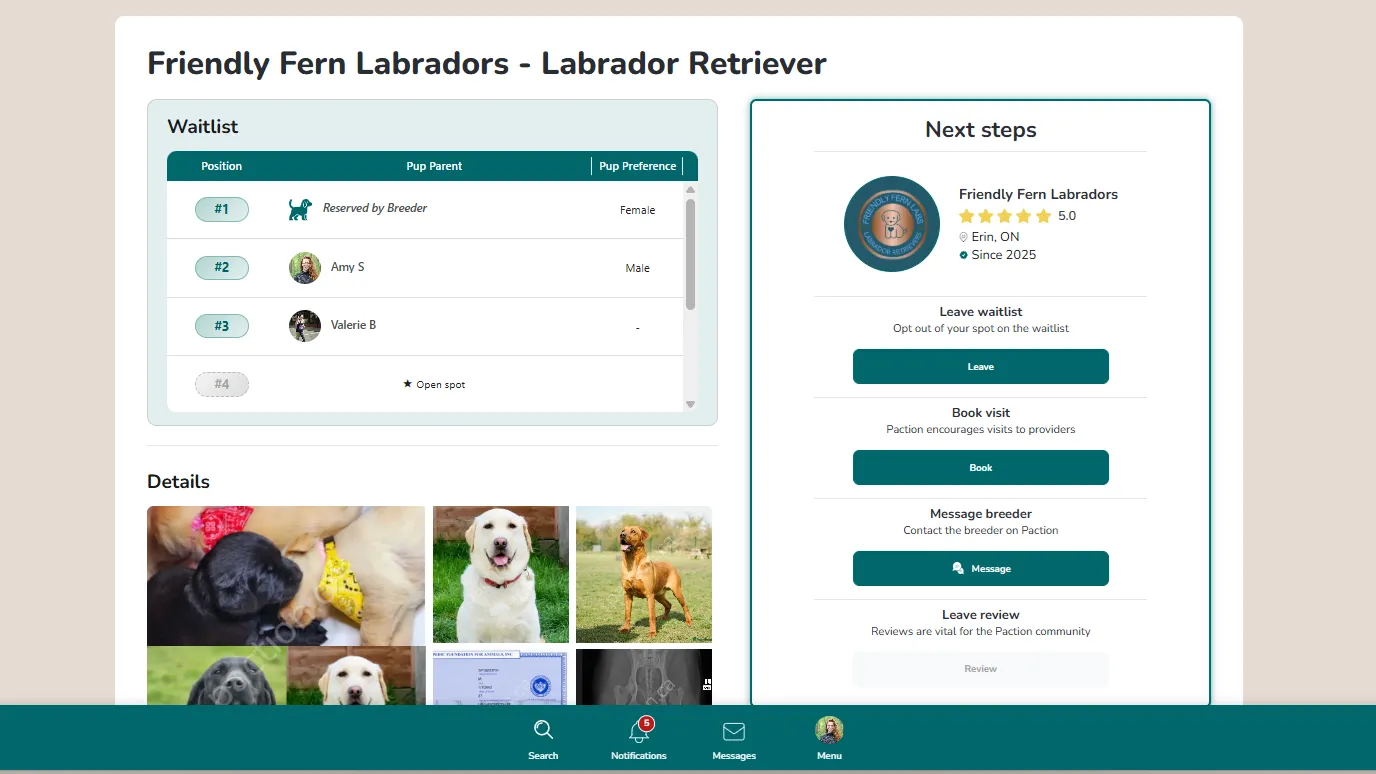
The Waitlist now appears in Search and also on your Profile for puppy shoppers to browse.
Step 1:
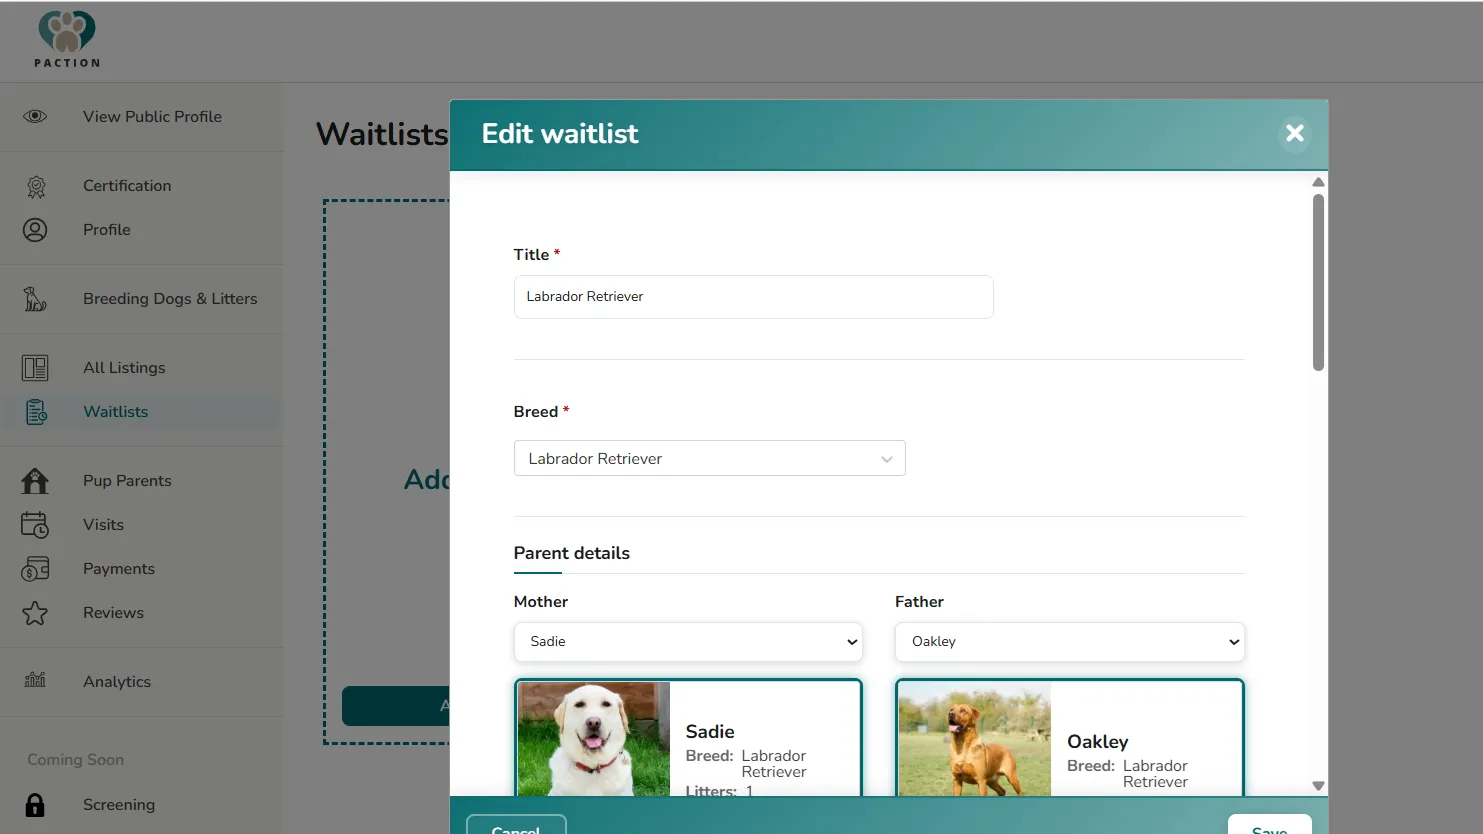
Once logged into your account, select "Waitlists" on the left navigation. Select "Edit" on the top right corner of the Waitlist card.

Step 2:
A pop-up with the editable Waitlist details will appear and allow you to make changes. Select "Save" on the bottom right when complete.
Step 1:
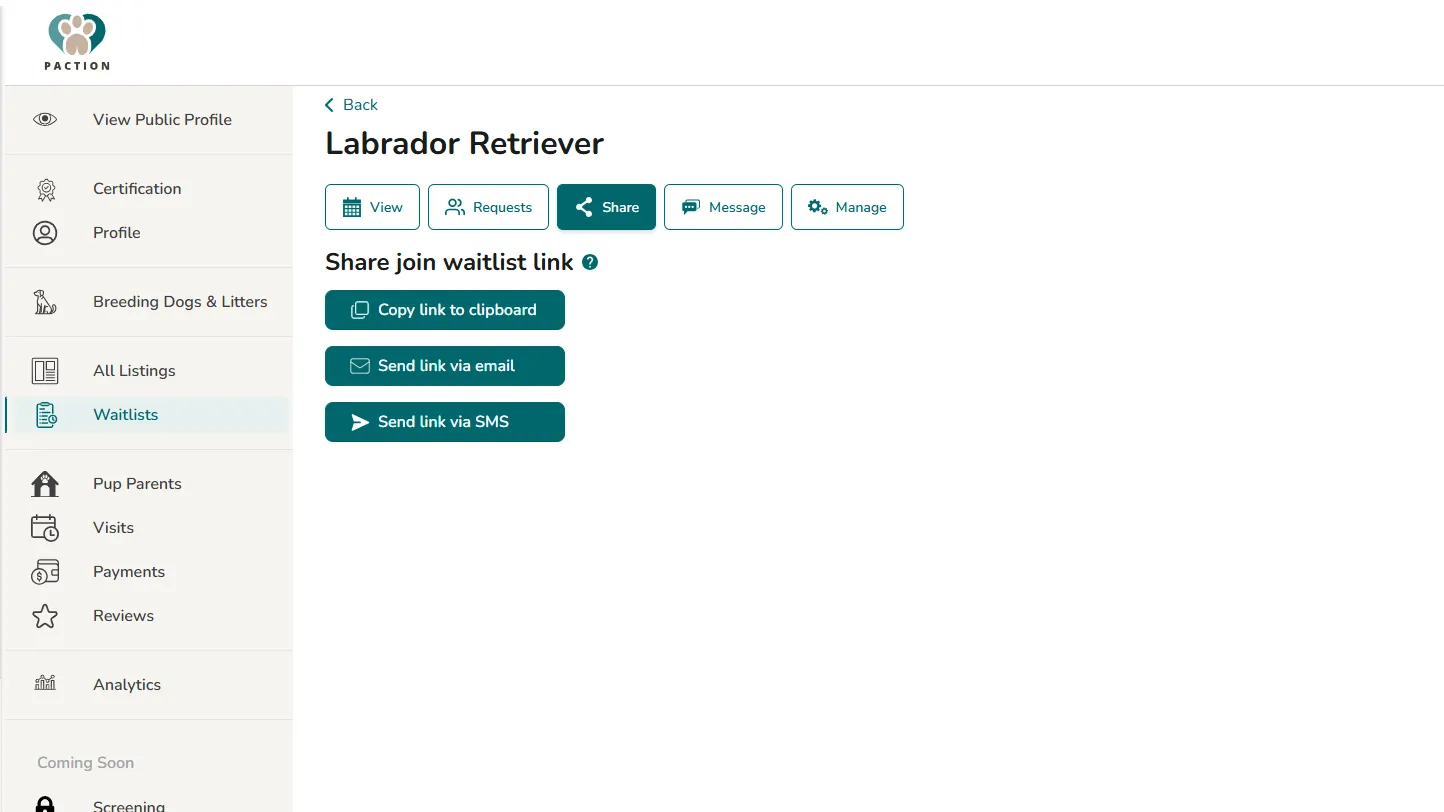
Once logged into your account, select "Waitlists" on the left navigation. Select the "Manage Waitlist" button on the Waitlist card that you wish to share.

Step 2:
Select the 3rd button called "Share". There are 3 ways to share your Waitlist - by SMS, email or by copying and pasting the link. To send via email or SMS, you click the associated button and must enter the intended recipient's cell number or email address.
Step 1:
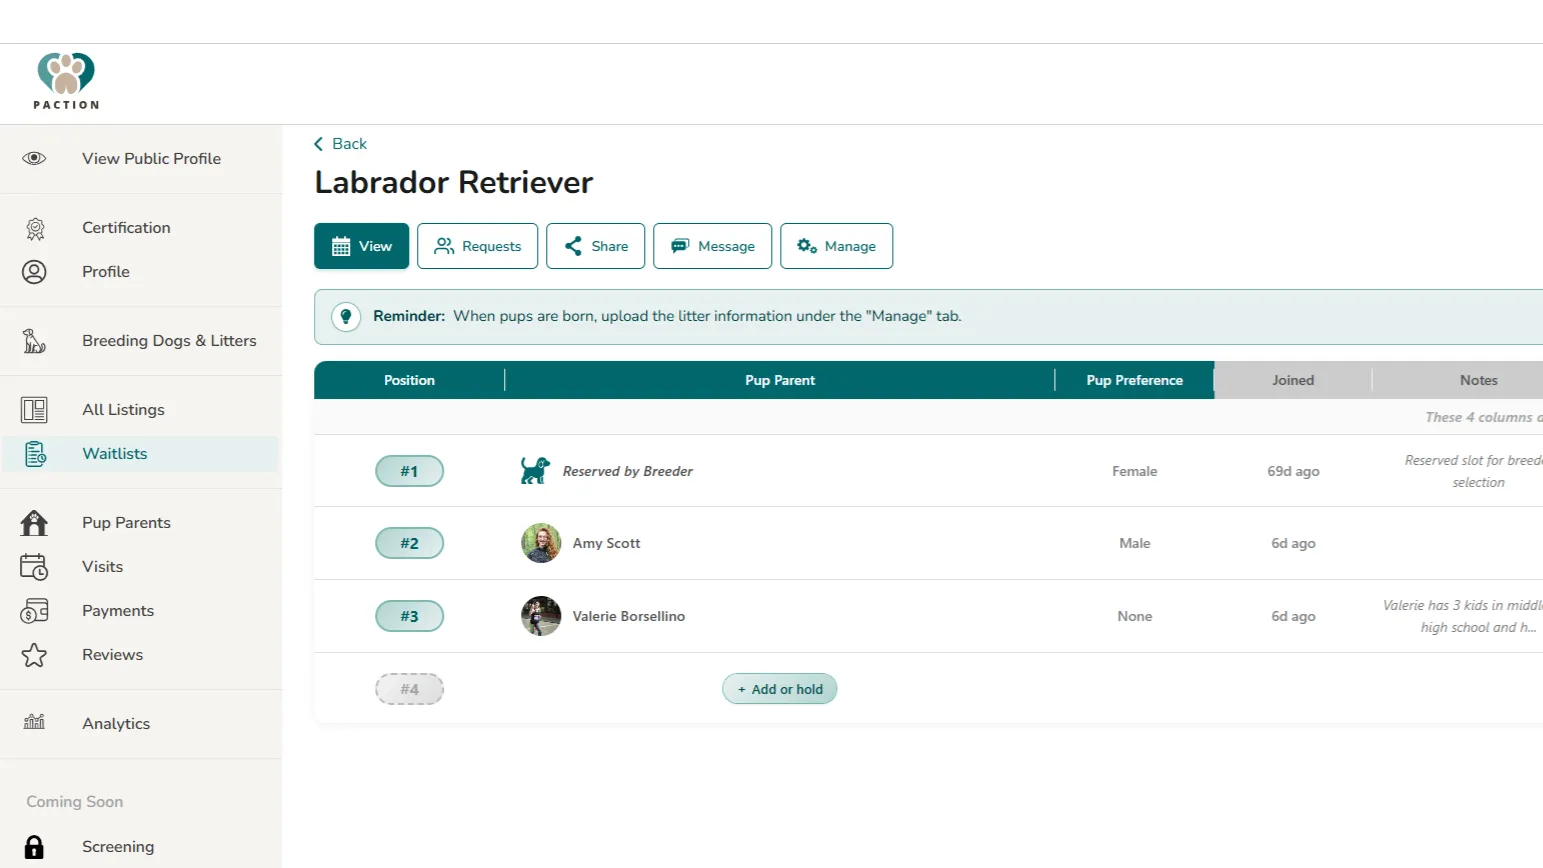
Once logged into your account, select "Waitlists" on the left navigation. Click the button on your Waitlist card that says "Manage Waitlist".

Step 2:
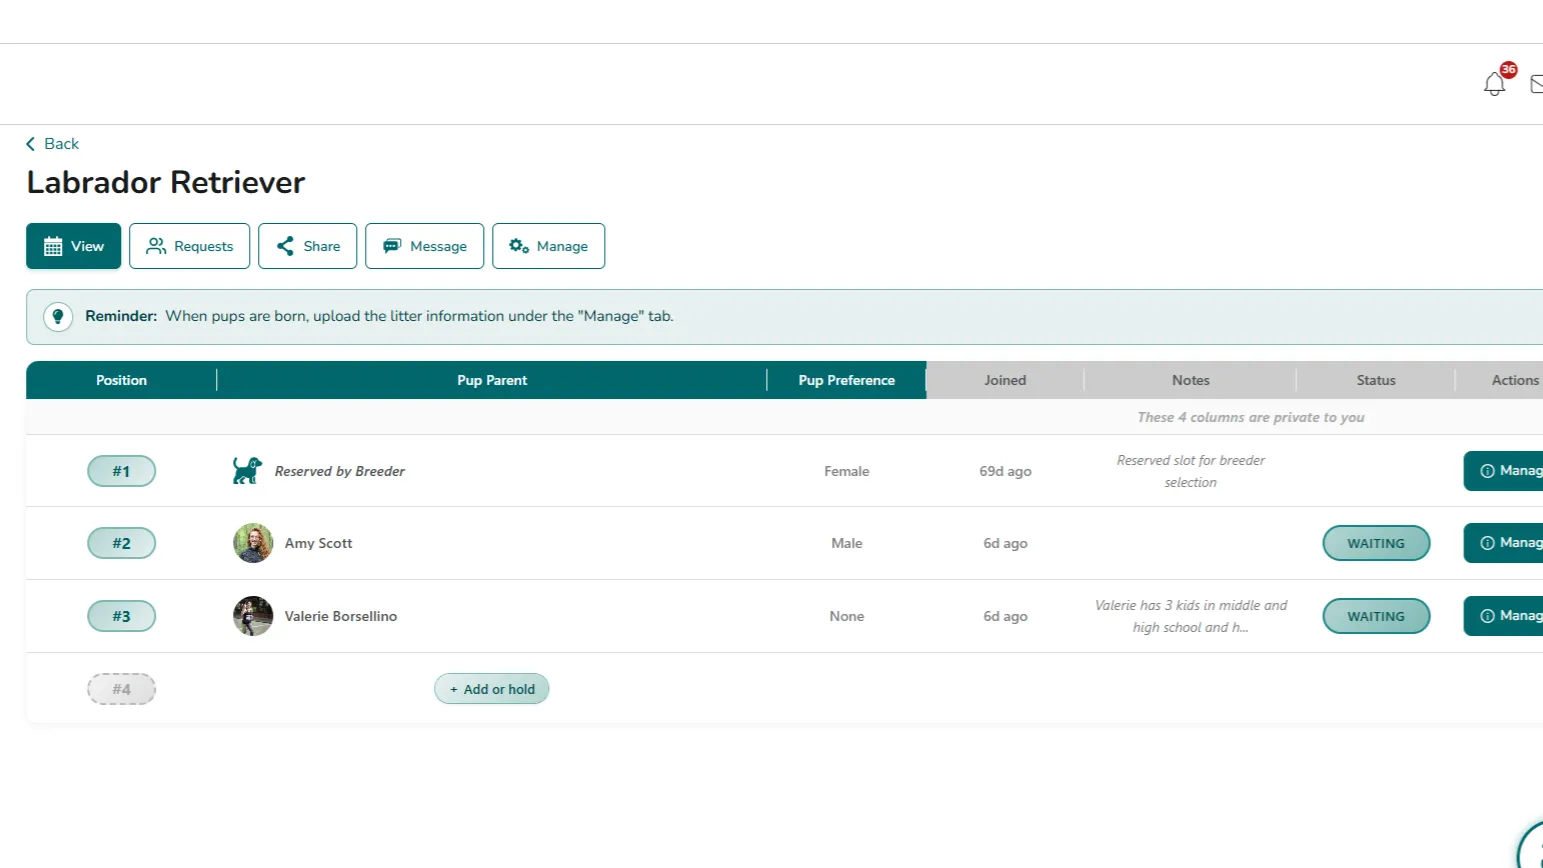
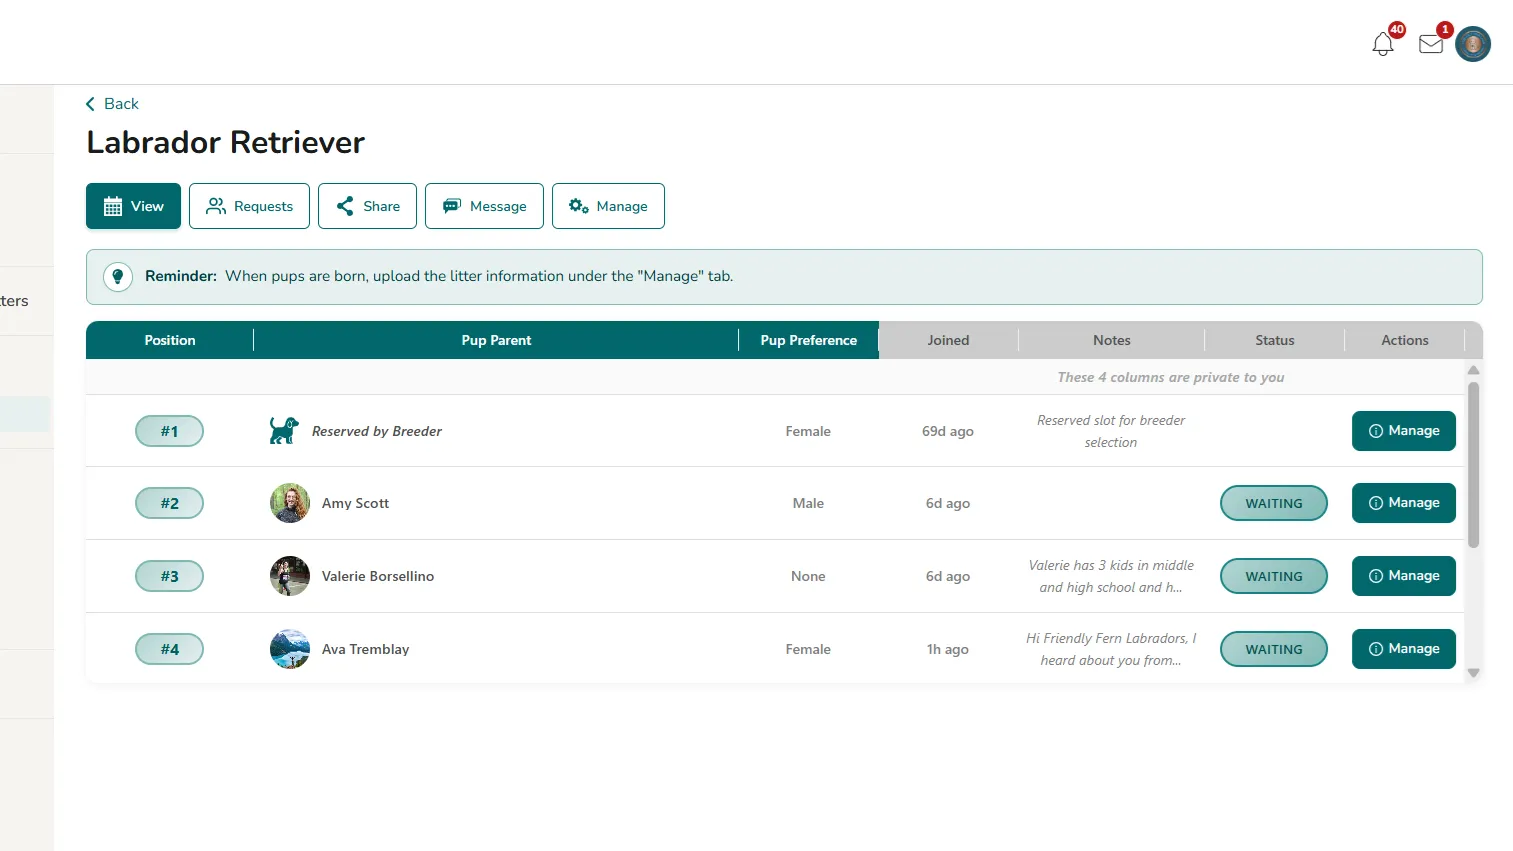
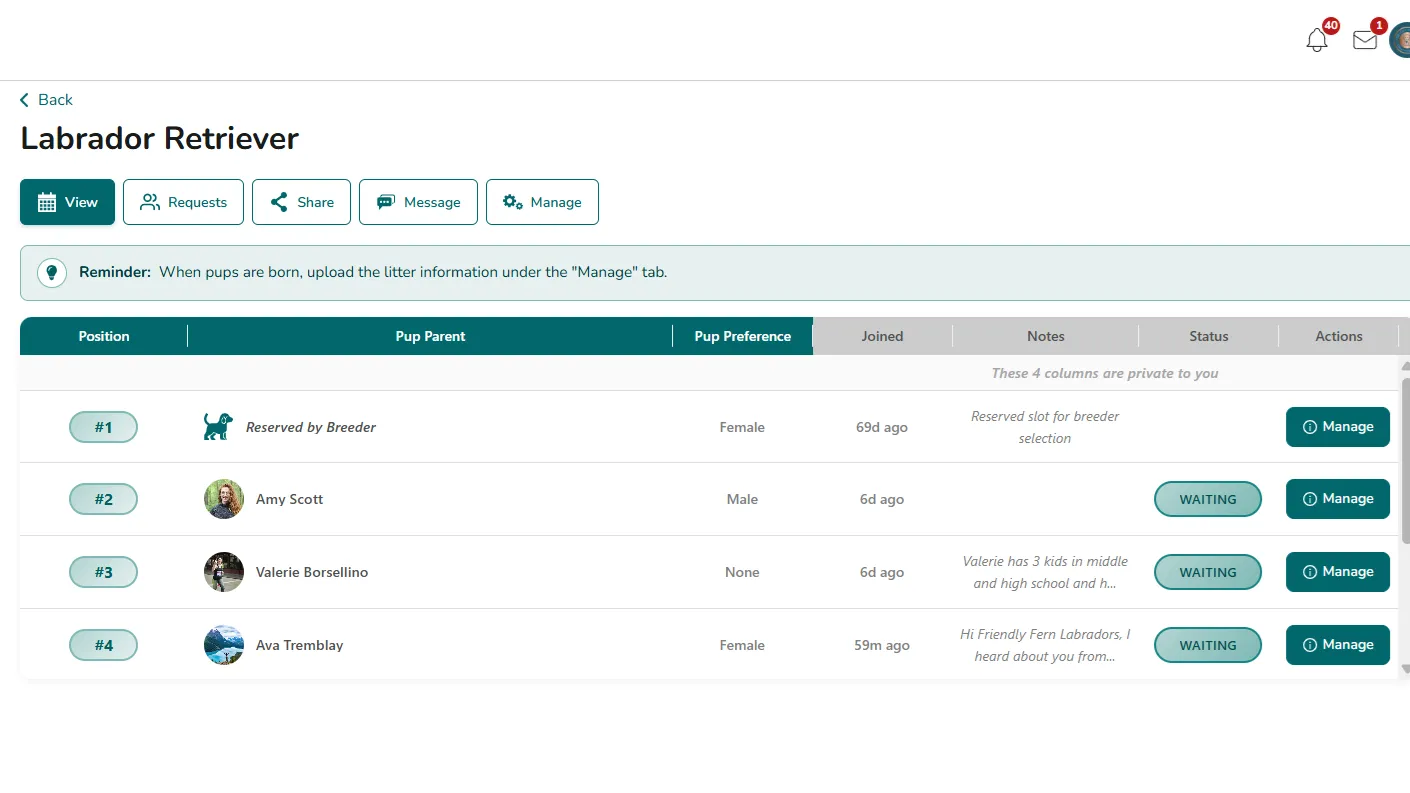
You will land on the first button "View" and see your current Waitlist. On the first open spot, there is a "+ Add or hold" button. Select that button.
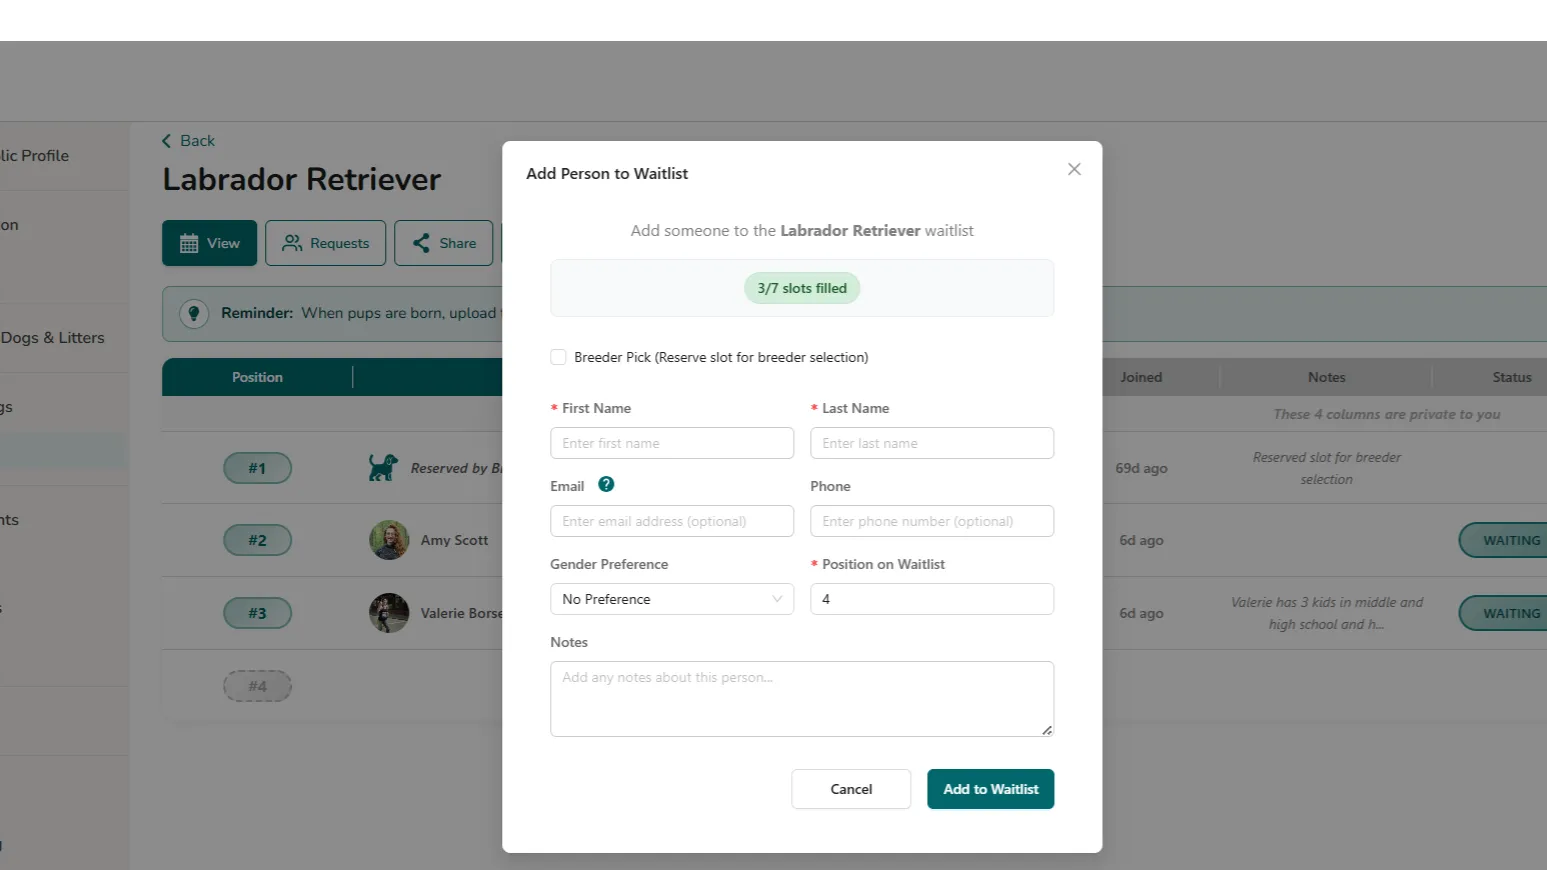
Step 3:
Clicking the button "+Add or hold" will result in this pop-up. You can manually add someone to your Waitlist. You may add their email address (optional) for your prospective pup parent to be invited via email to create a Paction account. If they choose to do so, the Waitlist will appear on their dashboard and they will receive updates and broadcast messages from you via their Paction account. After entering their information, hit "Save to Waitlist" on the bottom right of the pop-up.
Step 1:
Once logged into your account, select "Waitlists" on the left navigation. Select the "Manage Waitlist" button on the Waitlist card.

Step 2:
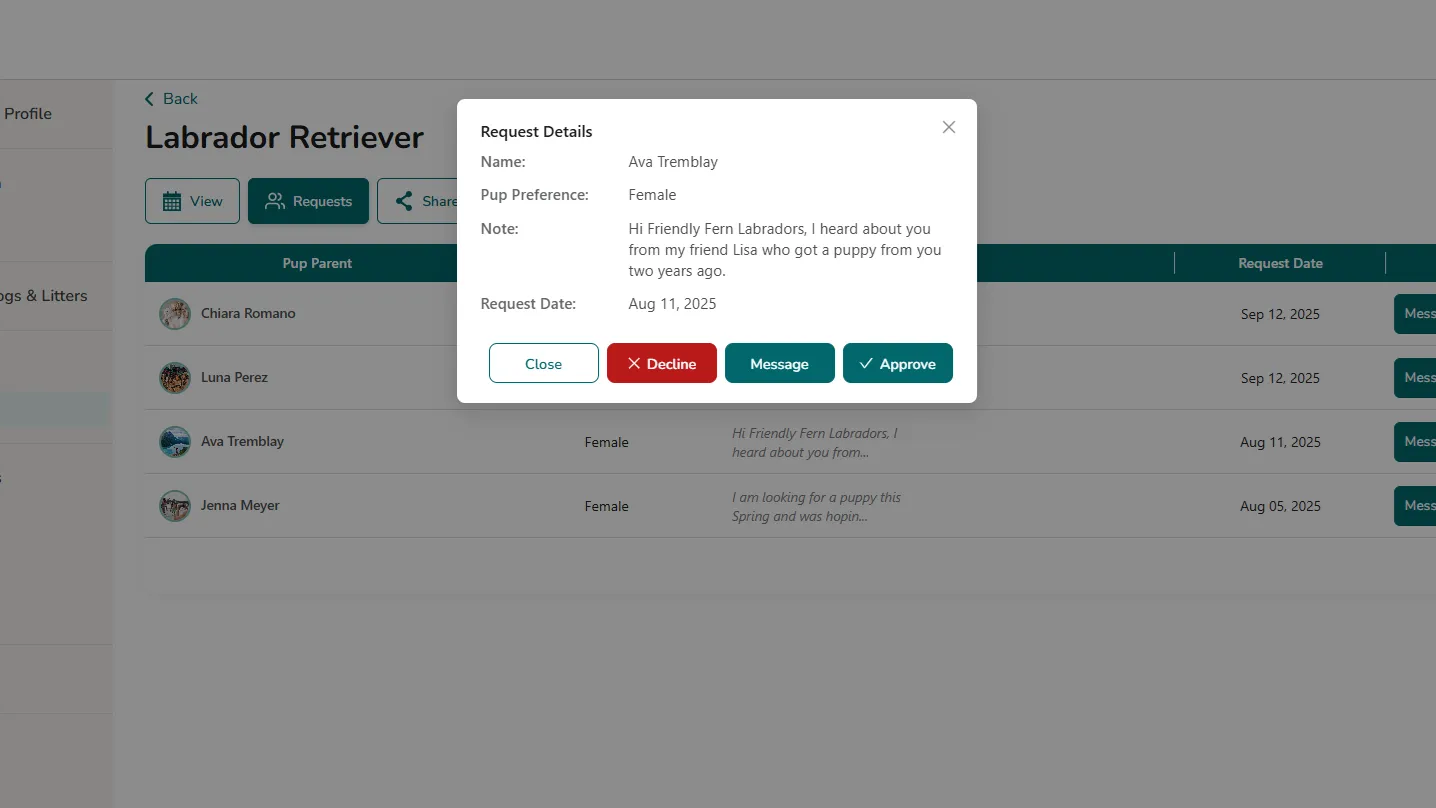
Select the second button at the top called "Requests". You'll see this table with prospective pup parents who have requested to join your Waitlist. The column on the far right, called "Actions" has a "Manage" button. Click that button.
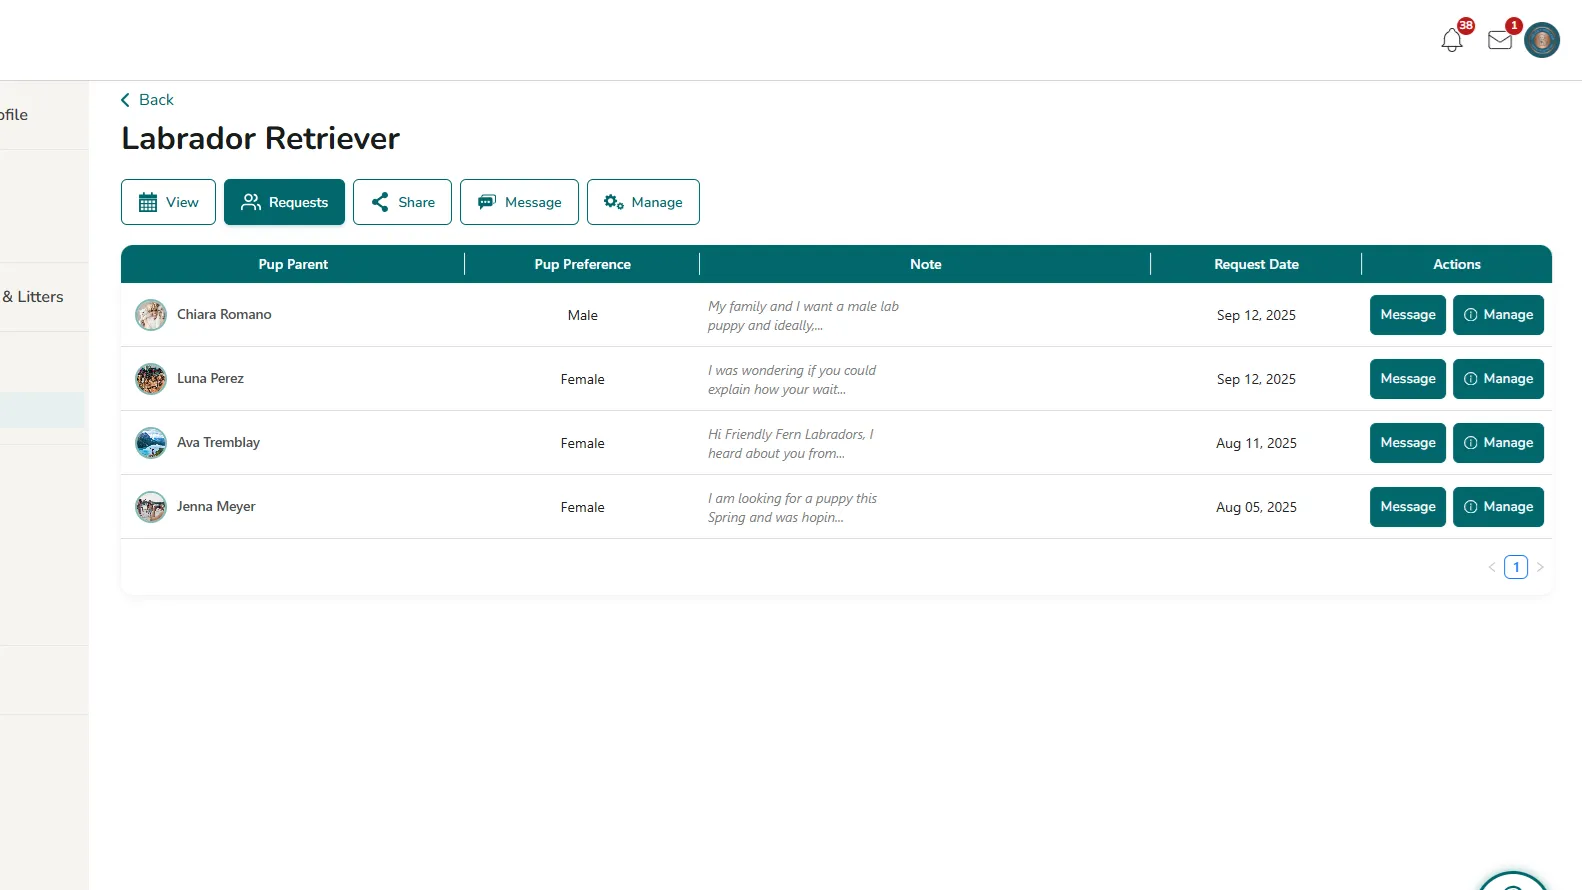
Step 3:
A pop-up will allow you to do the following: message the person who put in a request, decline them from joining your Waitlist or approve them to be added to your Waitlist. We highly recommend that you connect and speak with them before approving them to join your Waitlist. If you do approve them to join your Waitlist, they will appear in the next available open spot.
Step 1:
Once logged into your account, select "Waitlists" on the left navigation. On your Waitlist card, click the "Manage Waitlist" button.

Step 2:
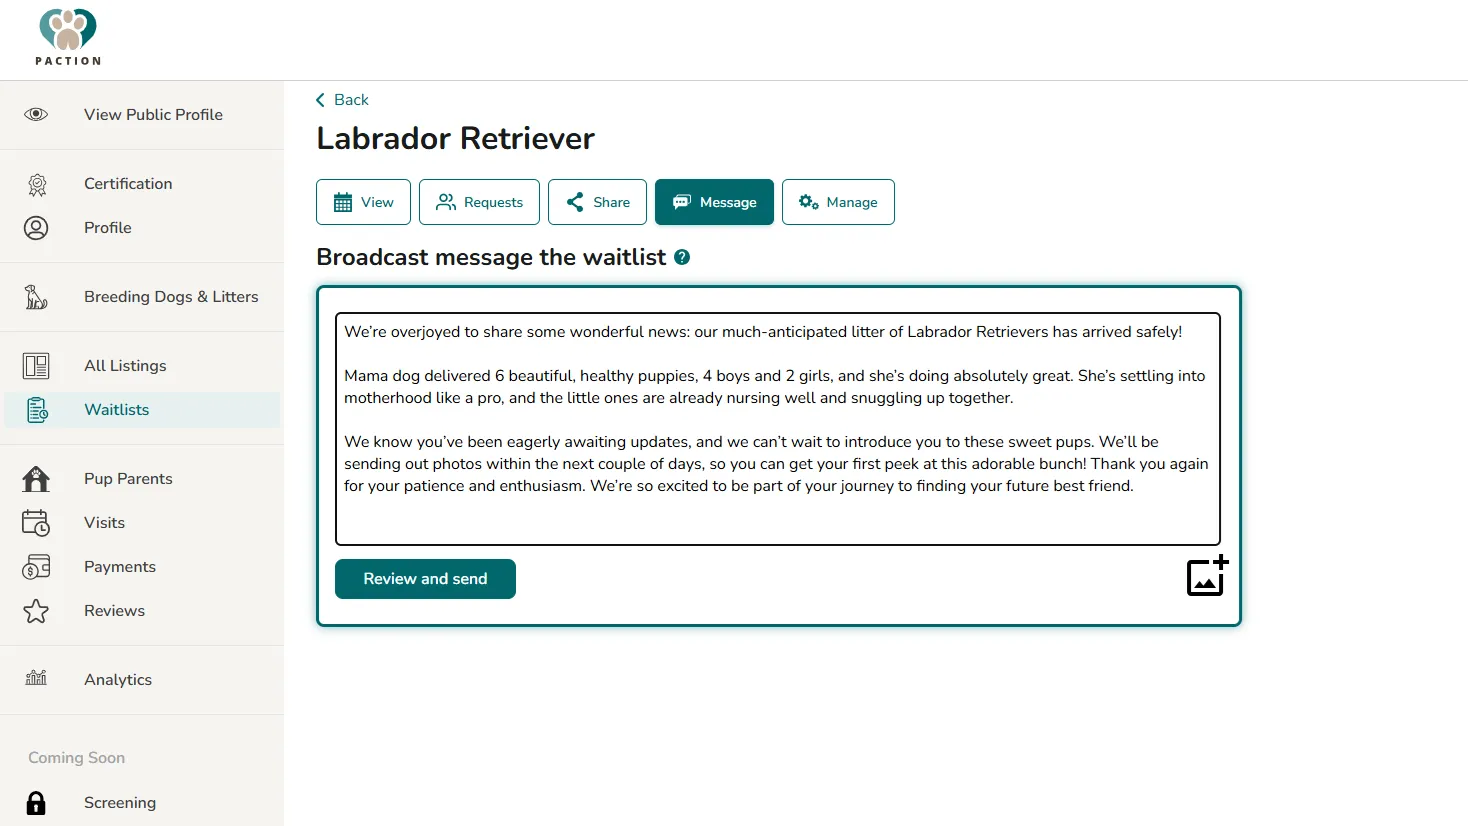
Click the 4th button called "Message". In the open field, type the message that you'd like to send the entire Waitlist. The bottom right button of an image with a plus sign can be clicked to add images to the message. Once you're done, click "Review and send" on the bottom left.
Step 3:
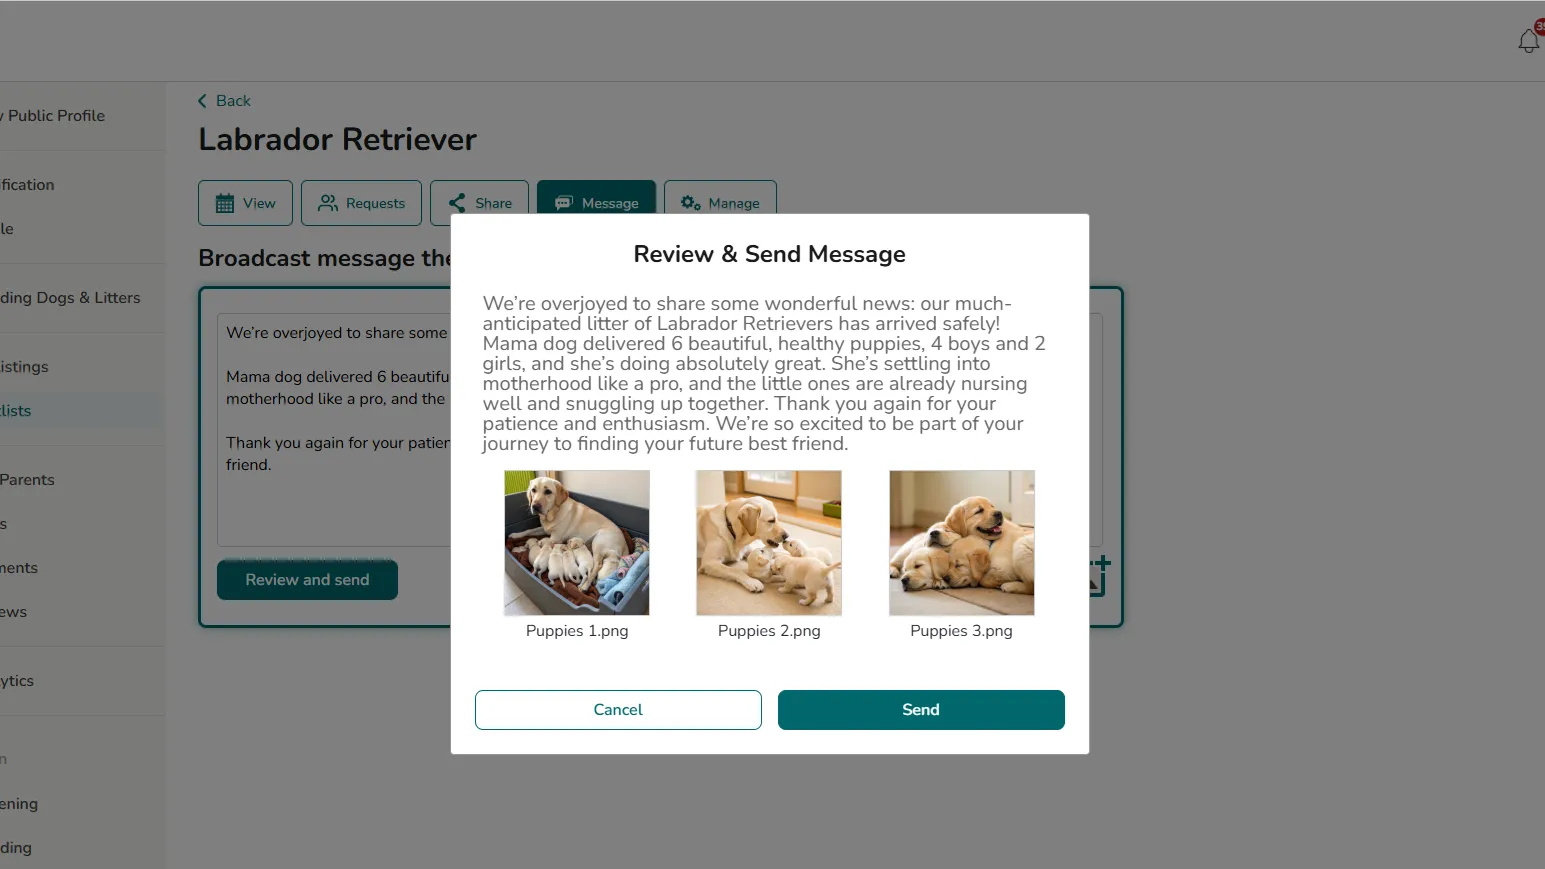
Review your message and see the attached photo files before deciding to click "Send". This message will go to all the pup parent accounts listed on the associated Waitlist.
Step 1:

Step 2:
In the first open Waitlist spot, select the "+ Add or hold" button to reserve a spot for your own breeding program.
Step 3:
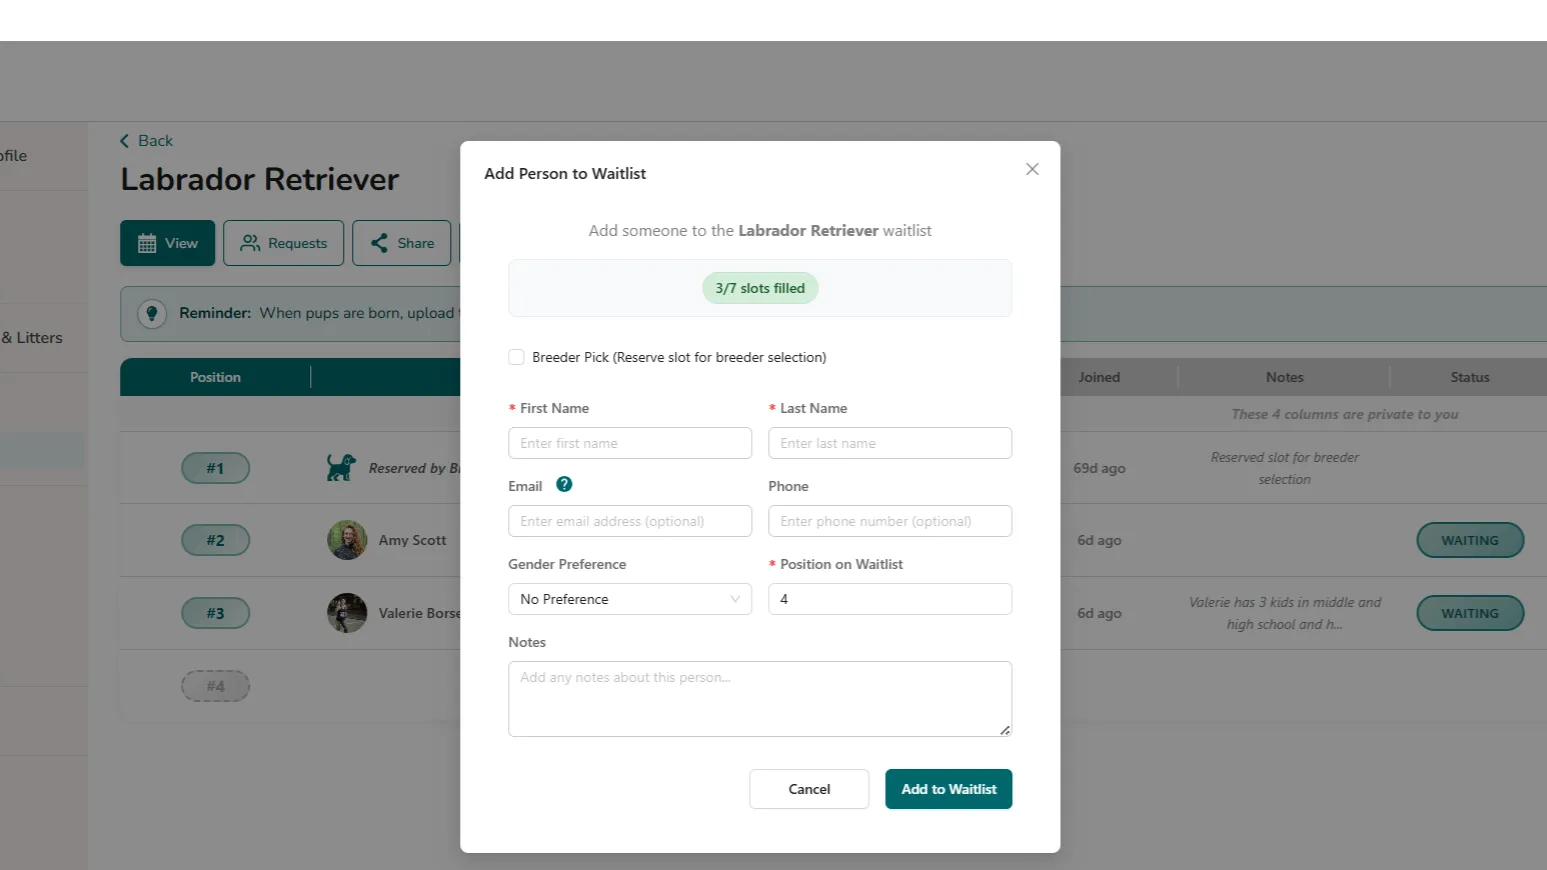
In the pop-up window, select the first check box that says, "Breeder Pick (Reserve slot for breeder selection)". Be sure to select the "Position on the Waitlist" for your pick. Then, click "Add to Waitlist" button on the bottom right of the pop-up to save.
Step 1:
Once logged into your account, select "Waitlists" on the left navigation. On your Waitlist card, click the "Manage Waitlist" button.
Step 2:
Under the first tab, "View", locate the "Manage" button on the far right column of the Waitlist. Click on the "Manage" button that pertains to the pup parent you wish to record private notes about.
Step 3:
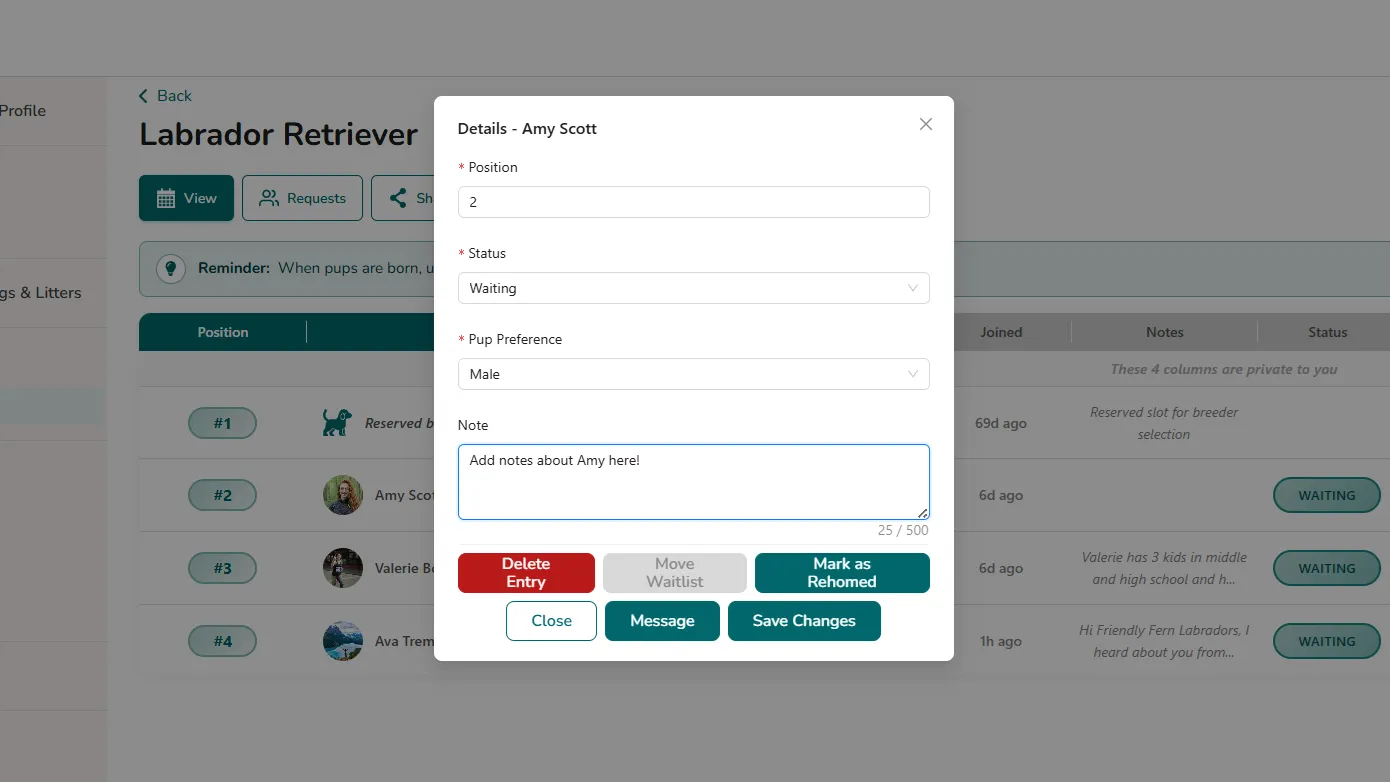
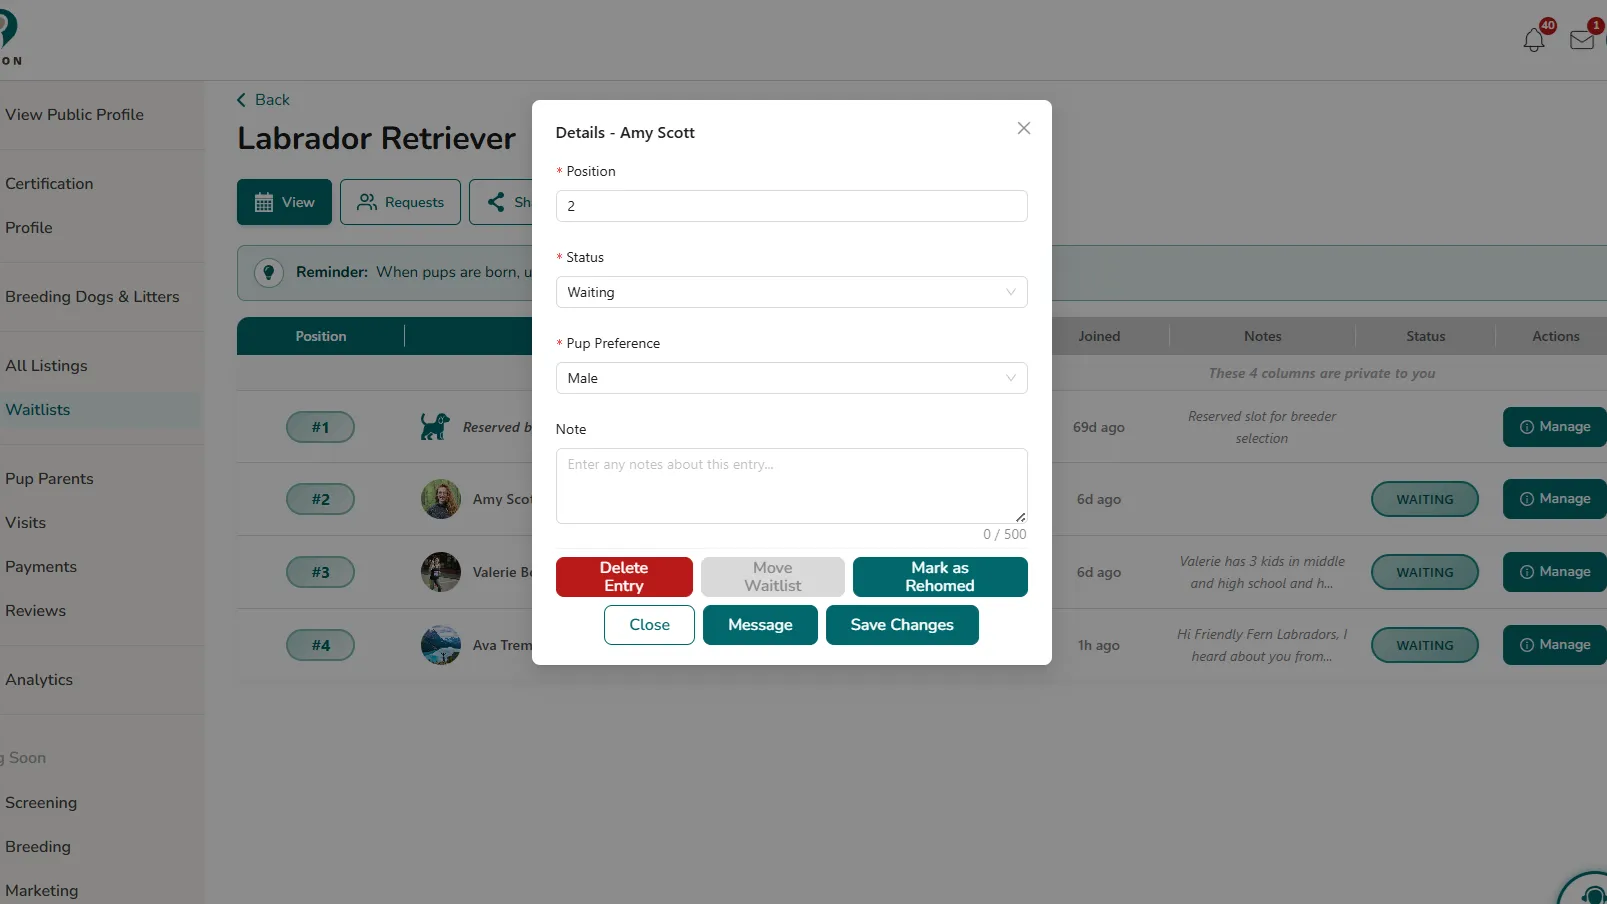
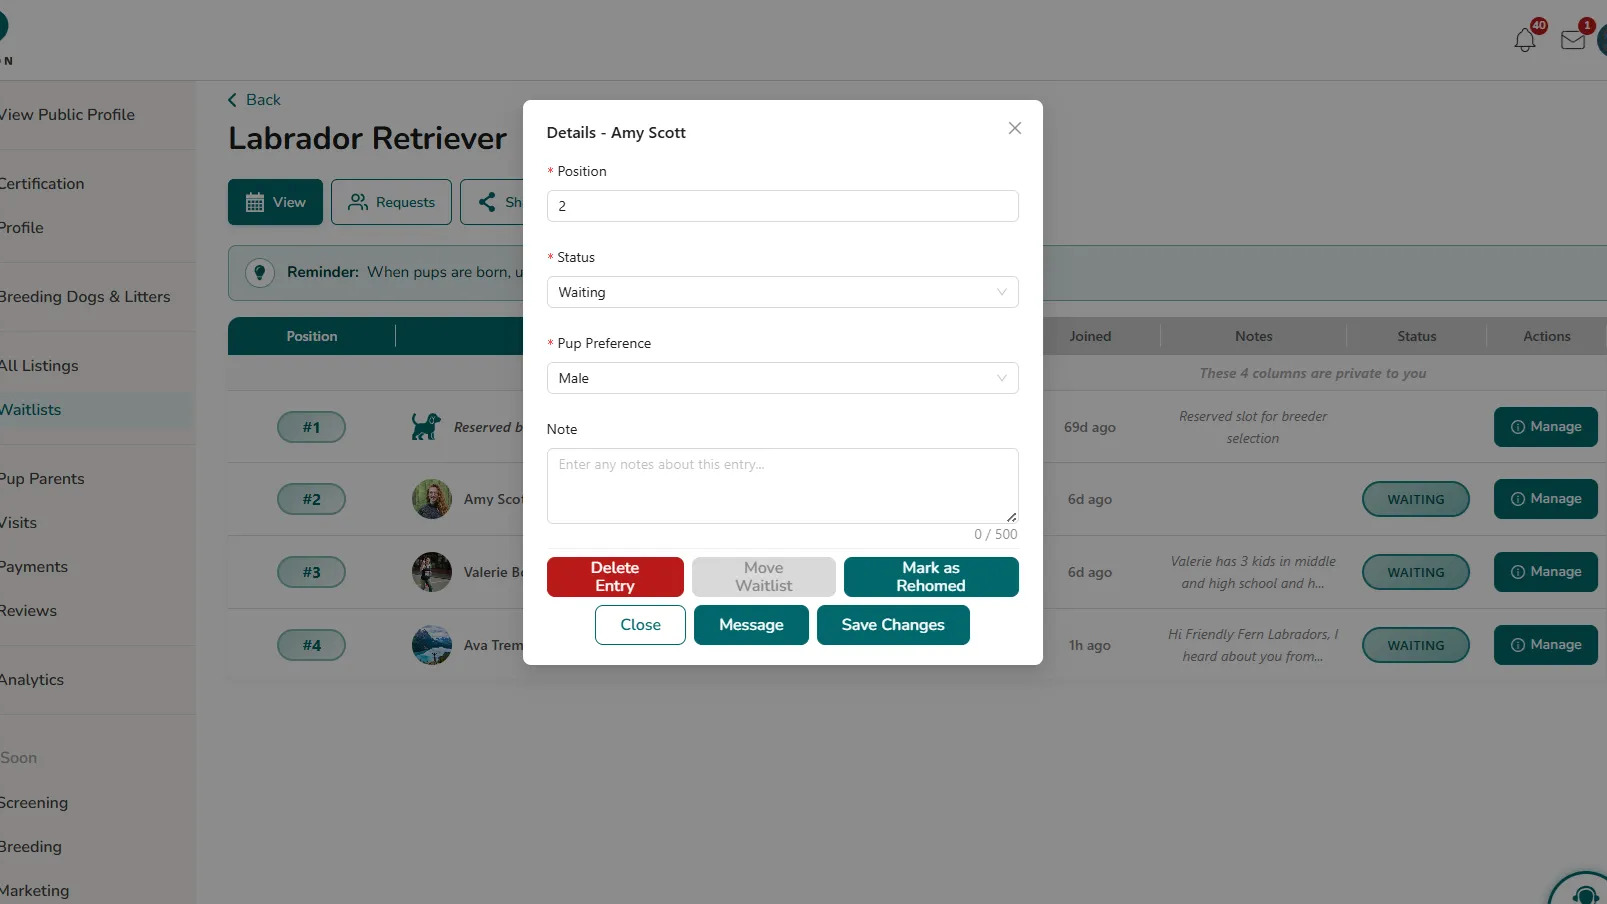
In the last open field of the pop-up, you can add whatever private notes that are relevant to this person on your Waitlist. These notes will never been seen by anyone but you inside your Waitlist dashboard. Click the "Save Changes" button to save your notes.
Step 1:
Once logged into your account, select "Waitlist" on the left navigation. Click the "Manage Waitlist" button on your Waitlist card.

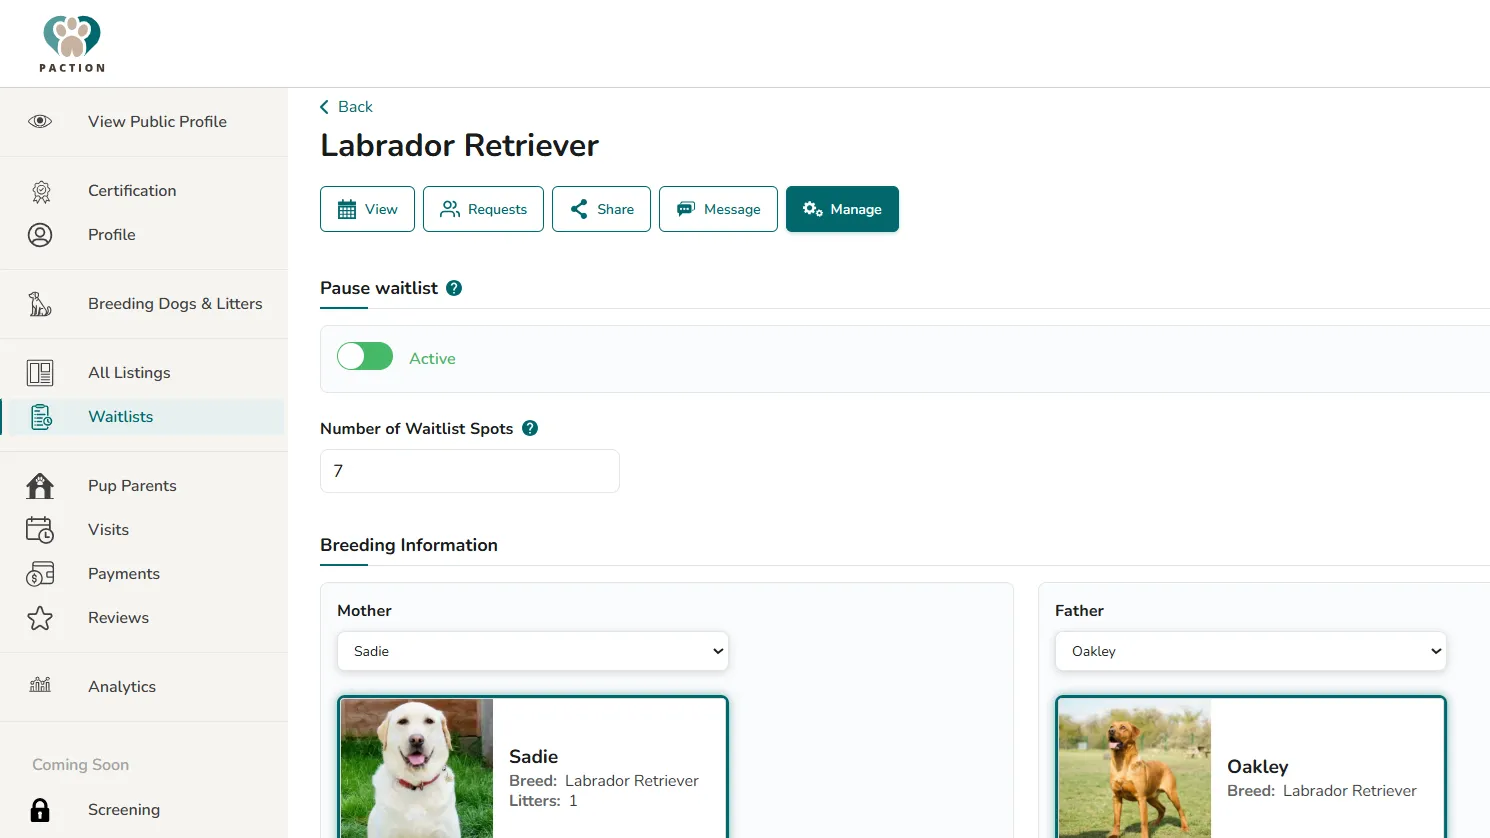
Step 2:
Click the 5th button that says "Manage". The very first button under the title "Pause waitlist" will show that your Waitlist is active. Toggle it inactive to pause your Waitlist. Pausing it prevents anyone new from joining and from it showing up in Paction's search results.
Step 1:
Once logged into your account, select "Waitlists" on the left navigation. On your Waitlist card, click the "Manage Waitlist" button.

Step 2:
Under the first tab, "View", locate the "Manage" button on the far right column of the Waitlist. Click on the "Manage" button that pertains to the pup parent's position you wish to change on the Waitlist.
Step 3:
The first field in the pop-up is the "position" on the Waitlist. You can edit that field and then click "Save Changes". If you move someone's position, everyone below that position on the Waitlist will shift one position down to accommodate the newly assigned position.
Step 1:
Once logged into your account, select "Waitlists" on the left navigation. On your Waitlist card, click the "Manage Waitlist" button.

Step 2:
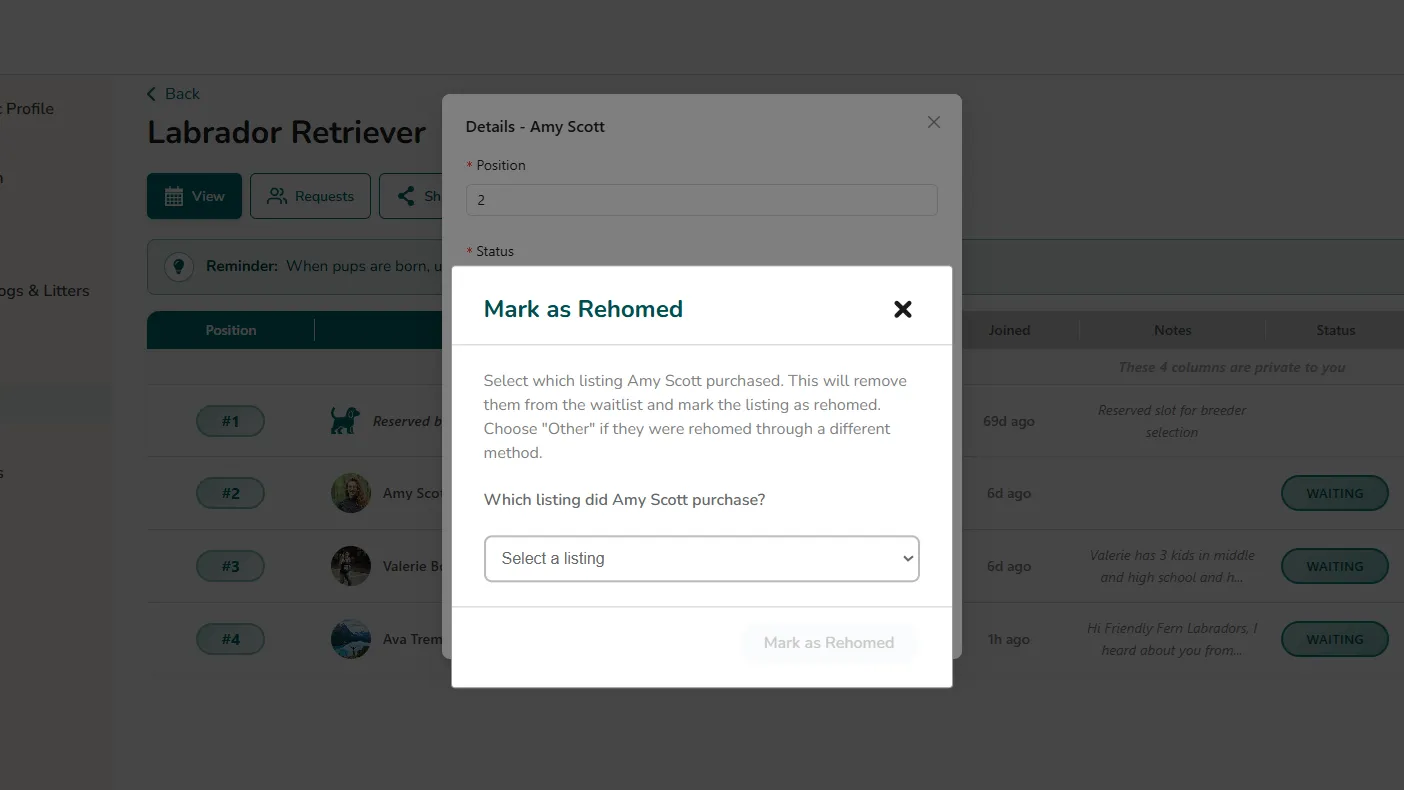
Under the first tab, "View", locate the "Manage" button on the far right column of the Waitlist. Click on the "Manage" button that pertains to the pup parent who you wish to remove from the Waitlist by marking as having rehomed one of your pups.

Step 3:
In the open pop-up, click the "Mark as Rehomed" button to remove this pup parent from the Waitlist by indicating they took home one of your pups.
Step 4:
Select the individual pup that this pup parent took home. Choose "Other" if the pup is not listed here or if rehomed by another method. Click the "Mark as Rehomed" button.